最近逛Github,无意中发现了个nginx waf的项目,总算找到一个心仪的了,以前找的要么功能简陋不更新了,要么太复杂,对小白新手不友好。
ngx_waf提供了很多waf功能
- 自动将cc的ip拉黑
- 自定义放行和屏蔽ip段(黑白名单),支持ipv4+ipv6
- 检测GET POST HEAD等请求体
- 限制特定路径访问
- 检测UserAgent、Cookie、Referer等
使用文档: https://add-sp.github.io/ngx_waf-docs/
整个配置文件十分简单,对新手和像站长我这样的小白很友好。下面就记录一下配置的过程,以及和开发者讨论后对特定问题的解决方案。
这几个月来该模块改动比较大,添加了很多高级功能,如5s盾、分区块写配置、高级规则等,编译请根据.configure反馈的内容补充依赖和进行相关配置,下面的编译演示是旧版的模块,所以请酌情参考
编译ngx_waf模块
文档中暂时只写了一种方式,在和开发者讨论中他又提供给我另外一种简洁的办法
这里只记录动态模块编译的过程,静态也差不多。
版本要求: nginx-1.18.0+
演示系统: debian10
动态模块编译方式一
通过nginx -V,看是否有--with-compat的字样,如果有可以使用下面的方式编译动态模块

我nginx的版本是1.19.8,那么我就需要下载相同版本nginx的源码来编译,同时确保安装了这些依赖
sudo apt install libpcre3-dev libperl-dev libgd-dev libgeoip-dev libxm12-dev libxslt1-dev uthash-dev libsodium-devmkdir /build
wget http://nginx.org/download/nginx-1.19.8.tar.gz
tar -xf nginx-1.19.8.tar.gz && rm nginx-1.19.8.tar.gz
mkdir 3rd && cd 3rd
# 使用v5.1.1
wget https://github.com/ADD-SP/ngx_waf/archive/refs/tags/v5.1.1.tar.gz
tar -xf v5.1.1.tar.gz && rm v5.1.1.tar.gz
mv ngx_waf-5.1.1 ngx_waf编译
cd /build/nginx
# 开始编译
./configure --with-compat --add-dynamic-module=/build/3rd/ngx_waf --with-debug
make modules -j$(nproc)
# 将ngx_http_waf_module.so拷贝到nginx模块组中
cp objs/ngx_http_waf_module.so /usr/lib/nginx/modules
动态模块编译方式二
这个方式也是目前文档中提及的方式,如果没有装好依赖,同样参考方式一将依赖安装好,通过nginx -V将
configure arguments后面的参数保留下来,同时去掉其中的add-dynamic-module参数。
准备环境,下载源码、模块、openssl
mkdir /build && cd /build
wget https://www.openssl.org/source/openssl-1.1.1k.tar.gz
tar -xf openssl-1.1.1k.tar.gz && rm openssl-1.1.1k.tar.gz
wget http://nginx.org/download/nginx-1.19.8.tar.gz
tar -xf nginx-1.19.8.tar.gz && rm nginx-1.19.8.tar.gz
mv nginx-1.19.8 nginx
cd nginx && mkdir 3rd && cd 3rd
# 将ngx_brotli添加进去(Nginx -V显示brotli不是动态模块)
git clone https://github.com/google/ngx_brotli
cd ngx_brotli && git submodule update --init
# 返回上级目录
cd ..
# 将ngx_waf添加进去
wget https://github.com/ADD-SP/ngx_waf/archive/refs/tags/v5.1.1.tar.gz
tar -xf v5.1.1.tar.gz && rm v5.1.1.tar.gz
mv ngx_waf-5.1.1  ngx_waf
接下来就是编译了
cd /build/nginx
# 用configure生成makefile参数
./configure --with-cc-opt='-g -O2 -fdebug-prefix-map=/build/nginx=. -fstack-protector-strong -Wformat -Werror=format-security -fPIC -Wdate-time -D_FORTIFY_SOURCE=2' \
     --with-ld-opt='-Wl,-z,relro -Wl,-z,now -fPIC' \
     --with-openssl=/build/nginx/../openssl-1.1.1k \
     --prefix=/usr/share/nginx \
     --conf-path=/etc/nginx/nginx.conf \
     --http-log-path=/var/log/nginx/access.log \
     --http-log-path=/var/log/nginx/access.log \
     --lock-path=/var/lock/nginx.lock \
     --pid-path=/run/nginx.pid \
     --modules-path=/usr/lib/nginx/modules \
     --http-client-body-temp-path=/var/lib/nginx/body \
     --http-fastcgi-temp-path=/var/lib/nginx/fastcgi \
     --http-proxy-temp-path=/var/lib/nginx/proxy \
     --http-scgi-temp-path=/var/lib/nginx/scgi \
     --http-uwsgi-temp-path=/var/lib/nginx/uwsgi \
     --with-compat \
     --with-debug \
     --with-pcre-jit \
     --with-http_ssl_module \
     --with-http_stub_status_module \
     --with-http_realip_module \
     --with-http_auth_request_module \
     --with-http_v2_module \
     --with-http_dav_module  \
     --with-http_slice_module \
     --with-threads \
     --with-http_addition_module \
     --with-http_flv_module \
     --with-http_geoip_module=dynamic \
     --with-http_gunzip_module \
     --with-http_gzip_static_module \
     --with-http_image_filter_module=dynamic \
     --with-http_mp4_module \
     --with-http_perl_module=dynamic \
     --with-http_random_index_module \
     --with-http_secure_link_module \
     --with-http_sub_module \
     --with-http_xslt_module=dynamic \
     --with-mail=dynamic \
     --with-mail_ssl_module \
     --with-stream=dynamic \
     --with-stream_geoip_module=dynamic \
     --with-stream_ssl_module \
     --with-stream_ssl_preread_module \
     --add-module=/build/nginx/3rd/ngx_brotli \
     --add-dynamic-module=/build/nginx/3rd/ngx_waf

# 没有报错的话就可以开始编译了
make modules -j$(nproc)
# 编译好后将ngx_http_waf_module.so拷贝到nginx模块组中
cp objs/ngx_http_waf_module.so /usr/lib/nginx/modules
之后再进行一些收尾工作
sudo mkdir /etc/nginx/ngx_waf
# cd到ngx_waf的资源目录,将规则拷贝到其他地方,方便修改
sudo cp -r rules /etc/nginx/ngx_waf
# 编辑nginx.conf
sudo vim /etc/nginx/nginx.conf
# 在最上面引入ngx_waf模块
load_module "/usr/lib/nginx/modules/ngx_http_waf_module.so";
到这里ngx_waf模块算是安装好了
配置ngx_waf
官方文档其实写得很详细且简洁了,我这里还是贴一下我用的配置
waf on;
waf_rule_path /etc/nginx/ngx_waf/rules/;
waf_mode DYNAMIC;
waf_cc_deny rate=10r/m duration=2h size=50m;
waf_cache capacity=100;
waf_priority "W-IP IP W-URL URL CC ARGS UA W-REFERER REFERER COOKIE";
waf on表示开启防火墙
waf_rule_path表示规则绝对路径
waf_mode防火墙模式
waf_cc_deny cc检测限度(上面的例子表示每分钟请求上限为200次,超出封禁2小时),其中size用于设置记录 IP 访问次数的内存的大小
waf_cache 最多缓存多少个检测目标的检测结果,对除了 IP 黑白名单检测、CC 防护和 POST 检测以外的所有检测生效
waf_priority 规则优先级
编辑/etc/nginx/ngx_waf/rules/white-url,添加下面的内容(适用于wordpress)
(?i)(?:wp-json)
(?i)(?:wp-content)
(?i)(?:wp-includes)
(?i)(?:wp-admin)waf我用的是动态模式,更多模式请看文档
为了隐私不推荐使用 cloudflare,详情请参考下面这篇文章
Say No to Cloudflare: Say No to Cloudflare | ononoki’s Blog
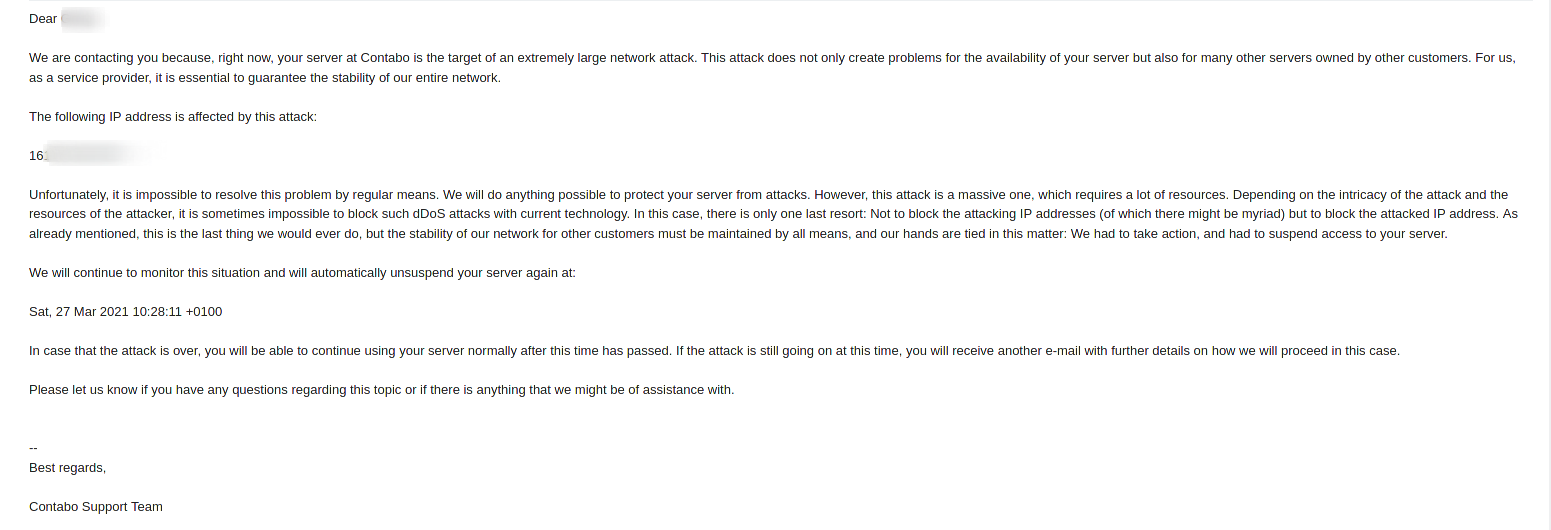
我的想法是这样的,当源站被d/被c的时候,服务器供应商会屏蔽大陆访问,这时可以用cloudflare中转一下
点亮cloudflare的云朵,使用cloudflare CDN,为防止cf 的 ip被服务器cc检测拉黑,因此我们还需要将cloudflare ip加入白名单 (使用ngx_http_realip_module就不会有这个问题了)
从cloudflare处获取真实ip,注意这么做有好处,waf可以动态的屏蔽恶意用户,哪怕回源的是cloudflare的ip
比如坏人A的ip是173.82.xxx.xxx, 那个ip做坏事,cloudflare的回源ip是 1.1.1.1
有一个好人B的ip是119.29.xxx.xxx,cloudflare的回源ip也是 1.1.1.1
那么A会返回503,而B则是正常的2xx或3xx响应
因此需要在nginx的配置中添加下面的内容
sudo vim /etc/nginx/cloudflare

# 内容如下
#Cloudflare real ip

# - IPv4
set_real_ip_from 173.245.48.0/20;
set_real_ip_from 103.21.244.0/22;
set_real_ip_from 103.22.200.0/22;
set_real_ip_from 103.31.4.0/22;
set_real_ip_from 141.101.64.0/18;
set_real_ip_from 108.162.192.0/18;
set_real_ip_from 190.93.240.0/20;
set_real_ip_from 188.114.96.0/20;
set_real_ip_from 197.234.240.0/22;
set_real_ip_from 198.41.128.0/17;
set_real_ip_from 162.158.0.0/15;
set_real_ip_from 104.16.0.0/12;
set_real_ip_from 172.64.0.0/13;
set_real_ip_from 131.0.72.0/22;

# - IPv6
set_real_ip_from 2400:cb00::/32;
set_real_ip_from 2606:4700::/32;
set_real_ip_from 2803:f800::/32;
set_real_ip_from 2405:b500::/32;
set_real_ip_from 2405:8100::/32;
set_real_ip_from 2a06:98c0::/29;
set_real_ip_from 2c0f:f248::/32;

real_ip_header CF-Connecting-IP;
然后在配置的server块等区域include /etc/nginx/cloudflare即可
之后将上面的waf配置添加到nginx配置的server字段中,一个实例如下
server {
     listen 80;
     listen [::]:80;
     server_name blog.hibobmaster.com;
     return 301 https://$server_name$request_uri;
     #limit_req zone=301 burst=5 nodelay;
     client_body_timeout 5s;
     client_header_timeout 5s;
 }
 server {
     listen 443 ssl http2;
     listen [::]:443 ssl http2;
     server_name blog.hibobmaster.com;
     root /var/www/wordpress;
     index index.php;
     client_max_body_size 20M;
     client_body_timeout 5s;
     client_header_timeout 5s;
     ssl_certificate /etc/nginx/ssl/blog.hibobmaster.com.cert.pem;
     ssl_certificate_key /etc/nginx/ssl/blog.hibobmaster.com.key.pem;
     ssl_session_timeout 1d; ssl_session_cache shared:MozSSL:10m;
     ssl_session_tickets off;
     ssl_dhparam /etc/nginx/dhparam;
     ssl_protocols TLSv1.2 TLSv1.3;
     ssl_ciphers ECDHE-ECDSA-AES128-GCM-SHA256:ECDHE-RSA-AES128-GCM-SHA256:ECDHE-ECDSA-AES256-GCM-SHA384:ECDHE-RSA-AES256-GCM-SHA384:ECDHE-ECDSA-CHACHA20-POLY1305:ECDHE-RSA-CHACHA20-POLY1305:DHE-RSA-AES128-GCM-SHA256:DHE-RSA-AES256-GCM-SHA384;
     ssl_prefer_server_ciphers off;
     ssl_stapling on;
     ssl_stapling_verify on;
     ssl_trusted_certificate /etc/nginx/ssl/blog.hibobmaster.com.cert.pem;
     resolver 1.1.1.1 8.8.8.8;

     waf on;
     waf_rule_path /etc/nginx/ngx_waf/rules/;
     waf_mode DYNAMIC;
     waf_cc_deny_limit 200 60;
     waf_cache_size 20m;


 location ^~ /wp-content/uploads/ {
     proxy_set_header Host $http_host;
     proxy_pass http://127.0.0.1:3333;
 }
 location / {
     try_files $uri $uri/ /index.php$is_args$args;
 }
 location ~ .php$ {
     try_files $uri =404;
     fastcgi_split_path_info ^(.+.php)(/.+)$;
     fastcgi_pass unix:/run/php/php8.0-fpm.sock;
     fastcgi_index index.php;
     include fastcgi_params;
     fastcgi_param SCRIPT_FILENAME $document_root$fastcgi_script_name;
 }
 location = /wp-login.php {
         auth_basic "Restricted";
         auth_basic_user_file /etc/nginx/.htpasswd;
         include fastcgi_params;
         fastcgi_pass unix:/run/php/php8.0-fpm.sock;
         fastcgi_param SCRIPT_FILENAME $document_root$fastcgi_script_name;
         }
 include /var/www/wordpress/nginx.conf;
 include /etc/nginx/cloudflare;
 brotli on;
 brotli_comp_level 6;
 brotli_static on;
 brotli_types application/atom+xml application/javascript application/json application/rss+xml
              application/vnd.ms-fontobject application/x-font-opentype application/x-font-truetype
              application/x-font-ttf application/x-javascript application/xhtml+xml application/xml
              font/eot font/opentype font/otf font/truetype image/svg+xml image/vnd.microsoft.icon
              image/x-icon image/x-win-bitmap text/css text/javascript text/plain text/xml;
}之后nginx -s reload重载web服务器
之后访问你的域名+/www.bak测试一下,比如 https://quanquan.space/www.bak,返回403就说明防火墙生效了!
更多详细的介绍请一定看文档,开发者已经写得很详细了
默认规则可能的两个误伤情景
在使用了默认规则后我目前遇到了两个问题
一个是wordpress写文章遇到更新失败。 此响应不是合法的JSON响应
另一个就是梯子连不上了~
解决-“更新失败。 此响应不是合法的JSON响应“
打开开发者控制发现有403字样,于是翻看nginx的access log和error log,发现了如下字段
2021/04/01 08:18:33 [alert] 3136#3136: *57311 ngx_waf_debug: [BLACK-POST][(?i)(?:\<(?:iframe|script|body|img|layer|div|meta|style|base|object|input))], client
: 2402:1f00:8001:c2b:2724::1, server: blog.hibobmaster.com, request: "POST /wp-json/wp/v2/posts/2082?_locale=user HTTP/1.1", host: "blog.hibobmaster.com", ref
errer: "https://blog.hibobmaster.com/wp-admin/post.php?post=2082&action=edit"关键词BLACK-POST,于是把这个路径添加到白名单即可
sudo vim /etc/nginx/ngx_waf/rules/white-url
# 添加如下内容
(?i)(?:wp-json\/wp\/v2\/posts)
之后重载服务器,会发现403 forbidden 问题得到了解决
总结
善用ngx_waf这个模块可以实现很多强大的功能,很多参数需要自己实际尝试才能找到适合自己需求的选项,比如cc的屏蔽阈值,这个可以通过浏览器开发者控制台计算,自己测试出一个合理的请求数
在探索互联网中,我学到了很多知识,有不懂的要敢于向开发者或者某些大佬请教,你问了被别人说小白,这只是个面子,你不问你可能永远不知道为什么是这样!
这篇文章总结自个人实践以及这个issue: https://github.com/ADD-SP/ngx_waf/issues/29
发表回复